-
Long shelflife
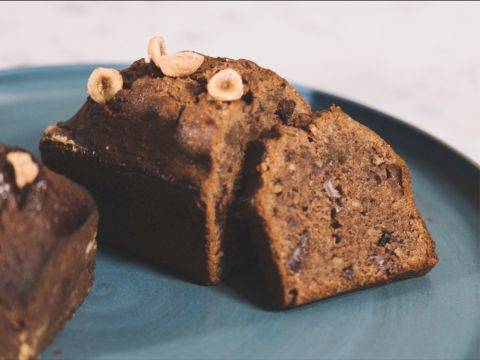
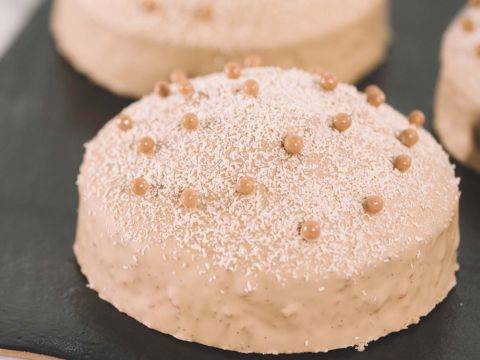
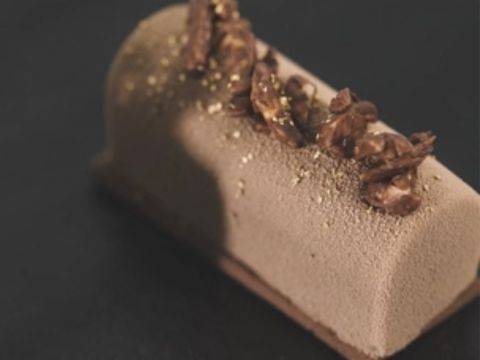
This beautiful cake has a very surprising look and texture thanks to an easy-to-accomplish chocolate snow garnish on top. This cake also contains no eggs, which contributes to its long shelf life.This beautiful cake has a very surprising look and texture thanks to an easy-to-accomplish chocolate snow garnish on top. This cake also contains no eggs, which contributes to its long shelf life.This beautiful cake has a very surprising look and texture thanks to an easy-to-accomplish chocolate snow garnish on top...
- Shelf life:
- 5 Days
- Conservation:
- Between 8°C - 16°C
Containing: 4 Components
White Chocolate & Macadamia Nut Batter
Ingredients: White Chocolate & Macadamia Nut Batter
-
Q.S.butter (melted)
-
Q.S.All purpose flour
-
180 gbutter
-
180 gsugar
-
270 gcake flour
-
1 gbaking powder
-
180 gFull fat Greek yogurt
-
225 gMacadamia nuts, chopped & slightly roasted
-
180 gCallebaut W2 White Chocolate
Preparation: White Chocolate & Macadamia Nut Batter
- Grind the macadamia nuts until obtaining a flour.
- Grease the molds with melted butter and flour them as well. This will ensure a clean release of the cake after the baking.
- Mix the butter and the sugar on high speed to incorporate some air.
- In the meantime, sift the cake flour and the baking powder together.
- Turn to low speed and add the yogurt, followed by the sifted ingredients, the melted chocolate and the ground macadamia nuts.
- Transfer into a piping bag.
- Pipe 360 g (12.7 oz) of batter in the molds and tap them on the table to make sure they are evenly filled. The quantity of batter depends on the size of the cake mold.
- Cover with a silicone mat and a metal tray.
- Bake at 150°C (302°F) for 32 minutes.
- Turn the molds upside down but leave the molds on the cakes.
- Let the cakes slightly cool down.
- Unmold and wrap them with plastic film and place them in the freezer.
View tools
- Piping Bag
- Scissors
- Bowl(s)
- Parchment paper
- Gloves
- Plastic film
- Spoon
- Brush
- Silicone mat
- Metal Tray (s)
- Tabletop mixer, mixing bowl and a paddle attachment
- Thermomix® or food processor
- 15.5 cm (6.1”) x 7.5 cm (2.95”) x 5 cm (2”) molds
- Cooling rack
- Spatula(s)
- Sifter
Yogurt Snow
Ingredients: Yogurt Snow
-
25 gcouverture 33.1%
-
50 gYogurt powder Maltosec
-
250 gCallebaut W2 White Chocolate
Preparation: Yogurt Snow
- Melt the white chocolate in the microwave.
- Mix the maltosec, the yogurt powder and the white chocolate together using gloved hands.
- Transfer onto a metal tray lined with parchment paper and let crystallize at 16°C (61°F).
View tools
- Metal Tray
- Microwave
- Bowl(s)
- Parchment paper
- Gloves
- Mixing bowl (s)
- Spatula(s)
Velvet Coating
Ingredients: Velvet Coating
-
9 gtitanium dioxide
-
600 gCallebaut W2 White Chocolate
-
200 gCallebaut Cocoa Butter
Preparation: Velvet Coating
- Melt the cocoa butter in a saucepan.
- Once melted, pour onto the melted chocolate and emulsify with an immersion blender.
- Add the titanium dioxide and continue mixing.
- Set aside until the assembly.
View tools
- Cooktop
- Saucepan
- Immersion blender
- Microwave
- Bowl(s)
- Spatula(s)
ASSEMBLY
Ingredients: ASSEMBLY
-
Q.S.Freeze-dried flowers
Preparation: ASSEMBLY
- Unwrap the cakes and, using a knife, dip them in the coating that should be at 32°C (90°F).
- Scrape the excess off the bottom of the cake and immediately place the cakes on top of the snow to ensure that it sticks well.
- Decorate with some freeze-dried flowers.
View tools
- Knife
- Bowl(s)
- Gloves
- Infrared Thermometer
- Tweezers
- Dessert tray

Facing Problems with your Creations?
- Find troubleshooting guides & tutorials
- Chat live with an advisor chef and find the right solution to your challenges



Comments
Submitted by Luke Vicite on Sat, 01/27/2024 - 05:17
I am new to baking and this is my stress reliever. I enjoy baking cakes though I'm not an expert but I admit that my pastries are good lol because I strictly follow the ingredients and cooking process. Hope to read more of your tips because this is informative. Thanks, by the way. <a href="https://citationvault.com">Local Citations</a>