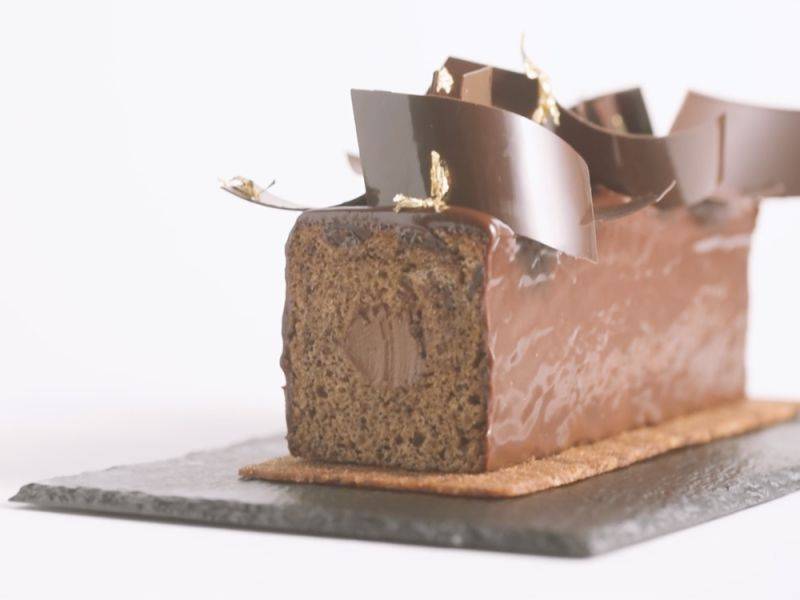
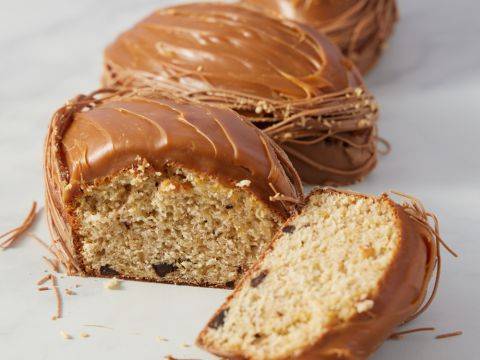
An elevated and tasty vegan version of the chocolate banana bread. There are no eggs or dairy in it, but its texture is very rich and moist. The exotic flavor of the passion fruit and mango crémeux pairs deliciously with the banana and the crunchy coconut streusel base. You won’t believe it’s vegan!An elevated and tasty vegan version of the chocolate banana bread. There are no eggs or dairy in it, but its texture is very rich and moist. The exotic flavor of the passion fruit and mango crémeux pairs deliciously with the banana and the crunchy coconut streusel base. You won’t believe it’s vegan!An elevated and tasty vegan version of the chocolate banana bread. There are no eggs or dairy in it, but its texture is ...
- Shelf life:
- 3 days
- Conservation:
- 5°C
Containing: 6 Components
Banana Bread
Ingredients: Banana Bread
-
1.2 lbRipe Fresh Bananas
-
5.1 ozDark brown sugar
-
4.1 ozVegetable oil
-
6.0 ozsoya milk
-
0.2 ozvanilla extract
-
12.3 ozflour
-
0.2 ozbaking powder
-
0.2 ozbaking soda
-
0.1 ozsalt
-
0.1 ozcinnamon powder
-
Q.S.vegan butter
Preparation: Banana Bread
- Preheat the oven to 175°C (347°F).
- Blend the bananas and sugar in the Thermomix® until smooth.
- Add the oil and mix well.
- Add the soya milk and vanilla extract and mix well.
- Sift the flour, baking powder, baking soda, salt and cinnamon powder.
- Add all the dry ingredients to the wet ingredients in the Thermomix and blend well.
- Stir the Callebaut® 811 Dark chocolate chips into the batter.
- Brush your cake mold with melted vegan butter. Make sure to grease the cylinder insert as well.
- Line the cake mold with parchment paper cut to fit the inside of the mold.
- Place the cake mold on the scale without the insert. Pipe 380g (13.4 oz) of batter into the mold.
- Insert the cylinder and then pipe another 240 g (8.5 oz), of cake mix into the mold.
- Bake for 30 minutes or until a cake tester inserted in the center of the cake comes out clean.
- Let the cakes cool down for 10 minutes.
- Twist the insert cylinder and pull it out gently.
- Pull out the banana bread and place on a cooling rack to cool completely. Do not remove the parchment paper right away since it keeps the moisture inside.
View tools
- Metal Tray
- Tall recipient
- Piping Bag
- Scissors
- Bowl(s)
- Parchment paper
- Scale
- Thermomix® or food processor
- Cooling rack
- Spatula
- Cake mold with cylinder inserts
- Pastry brush
- Sifter
Passion Fruit & Mango Crémeux
Ingredients: Passion Fruit & Mango Crémeux
-
4.4 ozwater
-
2.2 ozmango puree
-
2.2 ozPassion fruit purée
-
1.1 ozsugar
-
1.8 ozinulin
Preparation: Passion Fruit & Mango Crémeux
- Warm up the water and the purées in a saucepan to 70°C (158°F).
- Mix the sugar and inulin together.
- Sprinkle the sugar mixture into the warm purée while mixing with the immersion blender.
- Pour the warm mixture on the chocolate and leave it for a moment to allow the chocolate to begin melting.
- Mix with the immersion blender until well emulsified.
- Pour in a bowl and cover with plastic film making sure the film touches the entire surface of the crémeux.
- Reserve in the refrigerator until needed.
View tools
- Cooktop
- Saucepan
- Tall recipient
- Thermometer
- Immersion blender
- Bowl(s)
- Plastic film
- Spoon
- Spatula
Chocolate Glaze
Ingredients: Chocolate Glaze
-
8.8 ozsugar
-
4.4 ozPassion fruit purée, boiled & reserved
-
4.4 ozSoya cream, boiled & reserved
Preparation: Chocolate Glaze
- Warm up the passion fruit purée and the soya cream in the microwave until boiling, then reserve for later.
- Place a saucepan on the stove and gently warm it. Then sprinkle small amount of sugar in a dry saucepan and warm over medium high heat until the sugar dissolves.
- Once it dissolves, continue adding more sugar to the pan little by little.
- Once all the sugar is dissolved and well caramelized, add the passion fruit purée in small stages, mixing well after each addition.
- Repeat the same technique with the soya cream.
- Pour the resulting liquid on the chocolate and let it sit for a minute or two. Mix with the immersion blender until well emulsified.
- Pour in a bowl and cover with plastic film making sure the film touches the entire surface of the glaze.
- Refrigerate until needed.
- When needed, reheat to 40°C (104°F) for use in glazing the cakes.
View tools
- Cooktop
- Saucepan
- Tall recipient
- Immersion blender
- Bowl(s)
- Plastic film
- Spatula
Coconut Streusel
Ingredients: Coconut Streusel
-
2.1 ozAll purpose flour
-
1.6 ozCoconut flour
-
4.2 ozDark brown sugar
-
1.4 ozCoconut, shredded, unsweetened
-
3.2 ozvegan butter
-
1.6 ozcoconut oil
Preparation: Coconut Streusel
- Blend all the ingredients together in the table top mixer until well mixed.
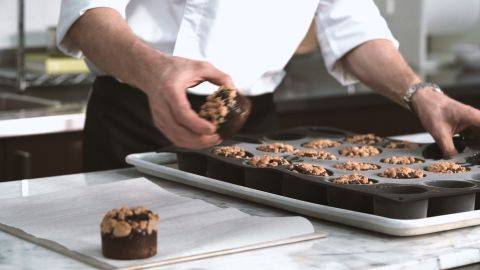
- Place the streusel on a Silpat-lined tray and shape into a rough rectangle.
- Top with another Silpat sheet before rolling it out to about 4mm (0.16”) thick.
- Refrigerate for 30 minutes or until hard.
- Once it’s set, remove the Silpat from both sides. Cover the streusel with a piece of parchment paper and turn over onto a plastic board.
- Place your template on the streusel and cut around it with a small knife. You only need two pieces of streusel for your two cakes.
- Place the streusel rectangles on a silicone mat and top with another sheet. Bake for 10 minutes in a preheated 160°C (320°F) oven, rotating as needed to ensure the streusel is evenly browned and baked.
- Once fully baked, remove from the oven and allow to cool completely.
- Reserve for assembly of the cakes.
View tools
- Metal Tray
- Bowl(s)
- Ruler (s)
- Rolling pin
- Cutting board
- Tabletop mixer, mixing bowl and a paddle attachment
- Spatula
- Silicone mats
- Cardboard or plastic DIY template 22cm x 7.5cm (8.7” x 2.9”)
- Chef Knife
Chocolate Structure Sheet Decoration
Ingredients: Chocolate Structure Sheet Decoration
Preparation: Chocolate Structure Sheet Decoration
- Start by cutting a guitar sheet to the size of the half pipe.
- Wet your plastic board with a damp paper towel and “stick” the cut guitar sheet on it.
- Pipe a small amount of precrystallized chocolate on the guitar sheet and spread it with your offset spatula.
- Let the chocolate set for 2 to 3 minutes. Once it’s dry to the touch, use the bicycle cutter to cut 3 cm (1.2”) strips.
- Place the guitar sheet with the chocolate strips inside the half pipe and refrigerate until set.
- Once set, remove the guitar sheet from inside the tube and carefully remove the chocolate strips.
- Reserve the strips for decorating the glazed cakes.
View tools
- Piping Bag
- Scissors
- Offset spatula
- Paper towel
- Plastic board
- Bicycle (5 or 6-wheel cutter)
- Guitar sheet
- Half pipe 7cm (2.7”) diameter
Assembly
Ingredients: Assembly
-
Cooled banana breads
-
Passion fruit and mango cremeux, in a piping bag
-
Chocolate and passion fruit glaze
-
Coconut streusel
-
Chocolate decorations
-
Gold leaves
Preparation: Assembly
- Once the banana bread is completely cooled, cut the sides and the top so that you end up with a perfect rectangle.
- Wrap it in plastic film and freeze it. It’s easier to fill the banana bread if it’s frozen but if you’re pressed for time, you can certainly skip the freezing time.
- Stand your cake on one end on the plastic board and fill the cavity with the crémeux. Turn it around and repeat on the other side. Apply firm pressure to the piping bag to ensure the crémeux evenly fills the cake.
- Place the cake on a rack.
- Pour the warm glaze on the cake and cover all sides well.
- Spread the glaze evenly with a small offset spatula.
- Place the glazed banana cake on a Silpat lined tray and refrigerate for about 10 minutes, just to set the glaze.
- Once set, use a serrated knife to cut a thin slice off the short sides to expose the cakes layers.
- Place the cake on a streusel base.
- Peel the chocolate decorations off of the guitar sheet.
- Decorate the glazed banana bread with the chocolate decorations and some gold leaves.
View tools
- Metal Tray
- Piping Bag
- Scissors
- Gloves
- Silicone mat
- Plastic board
- Large offset spatula
- Small offset spatula
- Serrated knife
- Cooling rack
- Small knife
- Plastic filling nozzle
- Service plate
Facing Problems with your Creations?
- Find troubleshooting guides & tutorials
- Chat live with an advisor chef and find the right solution to your challenges





Comments