-
Healthy
Astonish your customers with this rich, delicious, and decadent Chocolate Raspberry Fudge Cake. They are sure to be surprised by the fact that it’s 100% vegan.Astonish your customers with this rich, delicious, and decadent Chocolate Raspberry Fudge Cake. They are sure to be surprised by the fact that it’s 100% vegan.Astonish your customers with this rich, delicious, and decadent Chocolate Raspberry Fudge Cake. They are sure to be surp...
- Shelf life:
- 3 days
- Conservation:
- Refrigeration at 5° C (41° F)
Containing: 10 Components
Chocolate Fudge Cake
Ingredients: Chocolate Fudge Cake
-
7 gFlax seeds, ground
-
96 gwater
-
110 gPlant-based butter
-
160 gwater
-
127 gAll purpose flour
-
25 gTSK-CBA01C
-
2 gBaking Soda
-
3 gBaking powder
-
240 gsugar
-
100 gFlax eggs
-
17 gVegetable oil
-
50 gOat creme fraiche
Preparation: Chocolate Fudge Cake
- Preheat the oven to 160°C (320°F).
- Whisk together the ground flax seeds and the water and allow to rest for 10 minutes.
- Melt the butter and chocolate together in a plastic bowl in the microwave. Stir well.
- Whisk the oil and the oat crème fraîche into the melted chocolate mixture.
- Add the water and flax eggs and mix well.
- Add the sugar and whisk until thoroughly combined.
- Sift together both flours, the cocoa powder, the baking soda, and baking powder.
- Fold the dry ingredients into the wet ingredients in two additions, whisking well after each addition.
- Transfer the batter to a piping bag and cut a large hole for the tip.
- Pipe a 1 cm (0.4”) layer into the molds, place the mold on a rack, and then bake at 160°C (320°F) for 20 minutes.
- You can tell if the sponge is cooked by gently pressing down on the surface; when it’s ready, the sponge should spring back.
- Remove the baked cakes from the oven, and allow them to cool.
- Transfer to the freezer and allow to freeze completely before unmolding.
- Reserve the unmolded cakes, covered in plastic wrap, in the freezer until ready for the final assembly.
View tools
- Whisk
- Strainer
- Microwave
- Piping Bag
- Scissors
- Mixing bowl (s)
- Silicone mold: Flexipan® Origine Oval
- Spatula(s)
Crunchy Praline Layer
Ingredients: Crunchy Praline Layer
-
60 gPuffed rice cereal
Preparation: Crunchy Praline Layer
- Start by melting the chocolate in the microwave in stages until it is completely melted.
- Combine the melted chocolate with the praline and the puffed rice cereal, and mix well.
- Transfer the mixture to a metal tray lined with parchment.
- Spread it into a rectangle using an offset spatula.
- Cover with another sheet of parchment and roll to a 5mm (0.2”) thickness.
- Allow the praline layer to rest in the refrigerator until set.
- Once solid, peel away both parchment layers.
- Place the stencil on the praline layer, and cut around it with a small knife.
- The stencil should be the same size as the mold used to bake the Fudge Cake.
- You will need to cut 3 pieces.
- Remove the excess and store the shapes in the refrigerator until needed for assembly.
- The excess can be gently warmed in the microwave and used to create more inserts.
View tools
- Metal Tray
- Knife
- Microwave
- Parchment paper
- Offset spatula
- Rolling pin
- Stencils
- Bowl (s)
- Spatula(s)
Potato Protein Egg White Mixture
Ingredients: Potato Protein Egg White Mixture
-
145 gWater pH7
-
5 gPotato Protein
-
gLemon juice or citric acid
-
gbaking soda
Preparation: Potato Protein Egg White Mixture
- Test the water’s pH level. The ideal pH for this preparation is 7 (neutral).
- If the water is too alkaline (the pH is too high), add a drop of citric acid or lemon juice.
- If it is too acidic (the pH is too low), add a pinch of baking soda.
- Pour the water into a tall recipient and add the potato protein.
- Blend with an immersion blender until it is completely combined.
- Allow this mixture to hydrate for 30 minutes.
- You will use the egg white mixture in both the Italian meringue for the Raspberry Mousse and the Vegan Chocolate Sablée.
View tools
- Tall recipient
- Immersion blender
- PH test strips or meter
Potato Protein Italian Meringue
Ingredients: Potato Protein Italian Meringue
-
150 gPotato Protein Egg White Mixture
-
Q.S.Sůl
-
Q.S.xanthan gum
-
Q.S.baking soda
-
50 gSugar #1
-
100 gWater
-
250 gSugar #2
Preparation: Potato Protein Italian Meringue
- Pour the potato protein egg white mixture into the bowl of the tabletop mixer and whisk on medium speed until soft peaks form.
- Add a pinch of salt, xanthan gum, baking soda, and the first amount of sugar.
- Allow the mixture to continue whisking while heating the water and the second quantity of sugar in a small saucepan until the mixture reaches 118°C (244°F).
- Slowly pour the sugar syrup into the potato protein mixture while it is whisking.
- Keep whipping until the bowl feels cool to the touch.
- Reserve for use in the raspberry mousse.
View tools
- Cooktop
- Saucepan
- Thermometer
- Piping bag with round tip
- Spatula(s)
Raspberry Mousse
Ingredients: Raspberry Mousse
-
250 graspberry puree
-
20 gsugar
-
30 gpastry cream powder
-
1 gSoy lecithin, liquid
-
125 gOat creme fraiche
-
125 gPotato protein Italian meringue
Preparation: Raspberry Mousse
- Start by warming the raspberry puree in the saucepan until it comes to a boil.
- In the meantime, mix the pastry cream powder and sugar in a bowl.
- Pour half the raspberry puree over the combined sugar and pastry cream powder and mix well.
- Transfer this mixture back into the saucepan.
- Continue to heat the mixture while whisking until it thickens.
- Take the saucepan off the heat, add the Mycryo and soy lecithin, and mix well.
- Pour the mixture into a bowl, and cover with plastic wrap making sure the plastic touches the entire surface of the mixture.
- Refrigerate until it reaches 35oC (95°F).
- Once the mixture is cooled, mix in the oat crème fraîche.
- Then fold in half the Italian meringue and mix well.
- Add the remaining half of the Italian meringue and fold in carefully.
- Put the raspberry mousse in a piping bag fitted with a round tip.
- Pipe a 1 cm (0.4”) layer of the mousse in the silicone molds.
- Place in the freezer until completely frozen, then unmold, cover with plastic film, and store in the freezer until needed.
- Reserve the extra mousse in the piping bag for use in the final assembly.
View tools
- Cooktop
- Saucepan
- Whisk
- Plastic film
- Bowl (s)
- Piping bag with round tip
- Silicone mold: Flexipan® Origine Oval
- Spatula(s)
Chocolate Raspberry Ganache
Ingredients: Chocolate Raspberry Ganache
-
150 graspberry puree
-
40 gsugar
-
55 gSoya cream
-
12 gFramboise liqueur
Preparation: Chocolate Raspberry Ganache
- Melt the cocoa butter and the chocolate in the microwave in separate bowls.
- Meanwhile, combine the raspberry puree and sugar in a saucepan and warm them until the sugar is completely dissolved, at about 60°C (140°F).
- Warm the soy cream in the microwave and whisk it into the raspberry puree.
- Mix the melted chocolate and melted cocoa butter together and pour them into a tall recipient.
- Pour the warm raspberry mixture into the chocolate and homogenize with the immersion blender.
- Lastly, add the Framboise and emulsify.
- Pour the ganache into a piping bag and reserve for assembly.
View tools
- Cooktop
- Saucepan
- Tall recipient
- Immersion blender
- Microwave
- Piping Bag
- Mixing bowl (s)
- Spatula(s)
Dark Chocolate Glaze
Ingredients: Dark Chocolate Glaze
-
90 gOat milk
-
200 gglucose
-
150 gSugar
-
1 gpectin X58
Preparation: Dark Chocolate Glaze
- Bring the oat milk and glucose to a boil.
- Mix the sugar and pectin together and mix them into the milk.
- Bring the mixture back to a boil and cook for 1 minute.
- Pour the hot liquid over the cocoa mass in a tall recipient and homogenize with the immersion blender.
- Cover the glaze with plastic film, being sure the film touches the entire surface of the glaze.
- Store in the refrigerator until needed.
- You will use the glaze at 40°C (104°F) and may need to rewarm it.
View tools
- Cooktop
- Saucepan
- Immersion blender
- Spatula(s)
Vegan Chocolate Sablée
Ingredients: Vegan Chocolate Sablée
-
140 gcake flour
-
11 gCP
-
40 gmargarine, vegan
-
20 gcoconut oil, melted
-
20 gCoconut flour
-
35 gNCB-HDO3
-
22 gPotato Protein Egg White Mixture
-
55 gicing sugar
Preparation: Vegan Chocolate Sablée
- Mix the flour, cocoa powder, and vegan margarine in the bowl of a tabletop mixer fitted with the paddle attachment.
- Add in the coconut oil, coconut flour, and cocoa butter and mix again.
- Add the potato protein solution and icing sugar and mix just until the dough comes together.
- Do not overwork. The dough will be crumbly.
- Turn the dough out onto a bench covered in plastic film, and shape the dough into a rectangle of approximately 1 cm (0.4”) thick.
- Wrap the dough in the plastic film and place it in the refrigerator to rest for 30 min.
- Place the chilled dough between two guitar sheets, and roll it out to 3mm (0.12”) thickness.
- Remove the top guitar sheet.
- Using a template that is 2 cm bigger than the one used to cut the crunchy praline layer, cut shapes from the dough.
- You will need 3 pieces.
- Carefully place the cut dough onto a tray covered with a perforated Silpain®.
- Cover the dough cut-outs with a second Silpan®.
- Allow to rest in the refrigerator for about 30 minutes.
- Once chilled, bake the sablées in a preheated oven for about 20 minutes at 160°C (320°F).
- Once baked, allow the sablées to cool completely.
View tools
- Metal Tray
- Knife
- Bowl scraper
- Guitar sheets
- Rolling pin
- Tabletop mixer, mixing bowl and a paddle attachment
- Glazing rack
- Template
- Spatula(s)
Chocolate Decor
Ingredients: Chocolate Decor
-
Q.S.IBC creative gold powder
-
Q.S.F006694
-
Q.S.Pure alcohol 94%
Preparation: Chocolate Decor
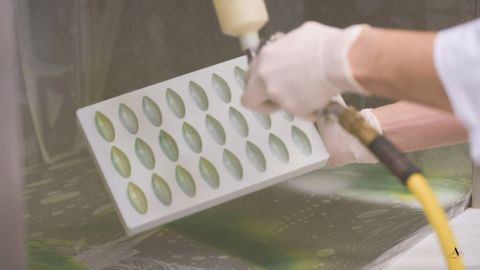
- Wipe a plastic board with a slightly damp cloth, place a guitar sheet on top, and smooth out any wrinkles.
- Mix each of the creative powders with a little alcohol to dissolve them.
- Using a natural sponge, dip it into the dissolved powder and then onto the guitar sheet.
- Print the sheet with the dissolved gold powder first, and then go back and dab the sheet with the scarlet powder.
- Spread a thin layer of dark chocolate on top and allow it to set.
- Place a stencil on top and cut around it.
- Cover with a guitar sheet and place a tray on top.
- Place into the fridge to set fully. This will take at least 30 minutes.
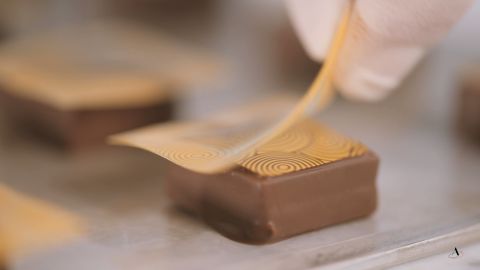
- Carefully unmold the chocolate decorations by gently peeling the guitar sheet away from the chocolate.
- Transfer the chocolate shapes to a clean tray lined with parchment, and reserve them for the final assembly.
View tools
- Knife
- Offset spatula
- Guitar sheets
- Stencils
- Plastic board
- Natural sea sponge
- Small mixing bowls
Final Assembly
Ingredients: Final Assembly
-
Q.S.gold leaf
-
Q.S.fresh raspberries
Preparation: Final Assembly
- Insert a layer of fudge cake into each cavity of the mold, and pipe a layer of ganache on top of it.
- Using a small, offset spatula, bring some of the ganache up to create a thin layer that covers the sides of the molds.
- Place a layer of crunchy praline on top of the ganache and press it down gently.
- Pipe a small amount of ganache on top of the praline layer and spread the ganache to cover the praline layer. This will help secure the next layer.
- Insert the second layer of fudge cake.
- Place a frozen layer of raspberry mousse on top of the cake layer. Press down lightly.
- Pipe some ganache on top of the mousse and spread it to cover the mousse.
- Place a final layer of fudge cake on top and press down gently.
- Cover with a sheet of parchment paper and place in the freezer until well frozen.
- Once the cakes are frozen, unmold them carefully.
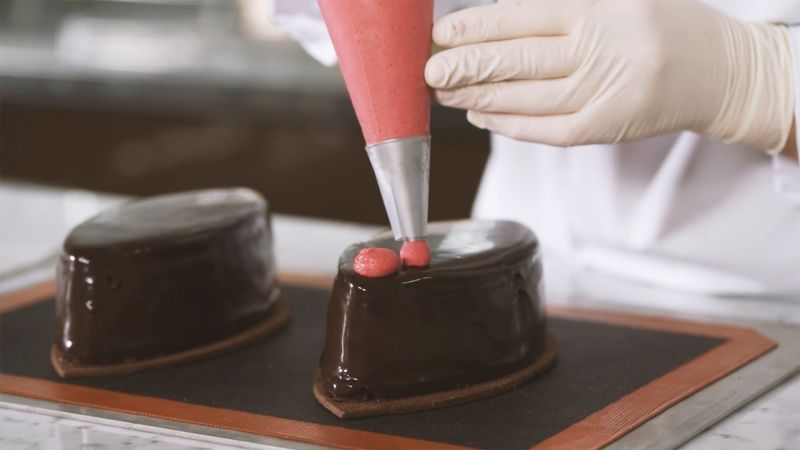
- Place the cake on a glazing rack and cover the cake with the Chocolate Pectin Glaze, being sure to cover all of the sides.
- Remember that your glaze should be at 40°C (104°F).
- Tap the rack lightly to remove any air bubbles.
- Using an offset spatula, carefully remove each cake from the glazing rack and place it on a sablée base.
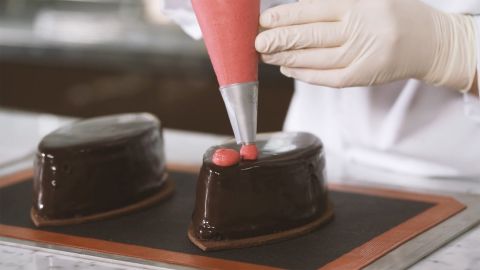
- Pipe some of the reserved raspberry mousse decoratively on top of the cake and top with a chocolate decoration.
- Decorate with fresh raspberries and gold leaves.
View tools
- Large offset spatula
- Small offset spatula
- Glazing rack
- Silicone mold: Flexipan® Origine Oval
Facing Problems with your Creations?
- Find troubleshooting guides & tutorials
- Chat live with an advisor chef and find the right solution to your challenges




Comments