-
Good to go
-
Short preparation time
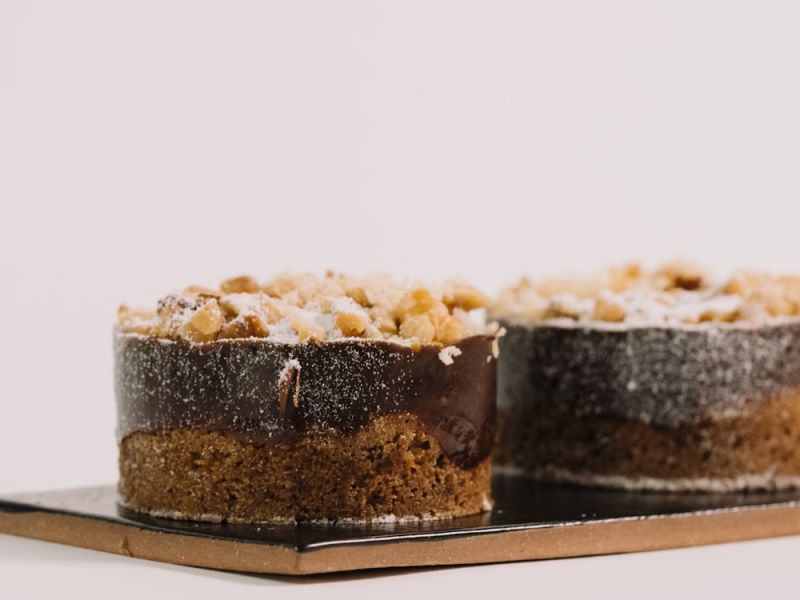
With this course, you will learn how to take a simple cookie to the next level. This recipe is inspired by overnight oats and banana bread and will allow you to explore several textures in one cookie.With this course, you will learn how to take a simple cookie to the next level. This recipe is inspired by overnight oats and banana bread and will allow you to explore several textures in one cookie.With this course, you will learn how to take a simple cookie to the next level. This recipe is inspired by overnight oat...
- Shelf life:
- 2 days
- Conservation:
- 20°C - 22°C at low humidity
Containing: 3 Components
Cookie Dough
Ingredients: Cookie Dough
-
11.6 ozlight brown sugar
-
4.1 ozRipe Fresh Bananas, mashed
-
4.1 ozsoft butter
-
0.2 ozMaldon sea salt flakes
-
2.8 ozGrapeseed oil
-
3.5 ozEggs, whole
-
4.9 ozAll purpose flour
-
4.9 ozbread flour
-
2.8 ozoat flour
-
0.2 ozbaking powder
-
0.2 ozbaking soda
-
0.1 ozNutmeg powder
-
6.3 ozAlunga
-
4.2 ozWalnuts, toasted and chopped
-
Q.S.Cooking Spray
-
0.5 ozvanilla extract
Preparation: Cookie Dough
- Put the brown sugar, soft butter, maldon salt and 25% of the dry ingredients in the bowl of the mixer and mix on low speed.
- As soon as the ingredients are combined, add the mashed bananas and mix well.
- Make sure the eggs are at 22°-23°C (72°-74°F) then combine them with the grapeseed oil and vanilla extract.
- Combine the flours, baking powder, baking soda and nutmeg together.
- Slowly add some of the wet ingredients alternating with the dry ingredients to the mixer and mix well after each addition.
- Scrape the batter off the paddle attachment.
- Add the chopped chocolate and walnuts and mix them in by hand.
- Place the batter into a bowl and cover with plastic film making sure the film is in contact with the entire surface of the batter. Allow it to rest in the refrigerator overnight.
- Place a metal tray lined with a silpat on your scale.
- Spray the ice cream scoop with some cooking spray.
- Scoop the batter into 30g (1.05 oz) portions. Roll into balls and place them on a metal tray lined with a silpat.
- Freeze the cookie balls and reserve in the freezer until needed.
- Once you are ready to bake the cookies, start by greasing the metal rings. Spray some cooking spray on a paper towel and wipe the rings.
- Place them on a metal tray lined with a silpat.
- Place one frozen cookie in each ring and press it down.
- Bake at 160°C (320°F) for 8-12 minutes or until the internal temperature reaches a minimum of 89°C (192°F) and a maximum of 95°C (203°F).
- Let them cool in the mold for a few minutes before unmolding them.
- Run a small paring knife around the rim and remove the ring. Let the cookies cool completely at room temperature until needed.
Tools
- Tall recipient
- Thermometer
- Scraper
- Bowl(s)
- Gloves
- Mixing bowl (s)
- Plastic film
- Scale
- Rack
- Small paring knife
- Metal Tray (s)
- Silpat (s)
- Tabletop mixer, mixing bowl and a paddle attachment
- Small ice cream scoop
- 60 mm (2.4”) metal rings
- Paper towels
- Spatula(s)
Salted Caramel
Ingredients: Salted Caramel
-
4.2 ozHeavy cream, 35% fat
-
0.9 ozglucose syrup
-
1 beans(s)Mexican vanilla bean
-
0.4 ozPowdered sorbitol
-
5.3 ozsucrose
-
1.0 ozButter
-
0.2 ozMaldon sea salt flakes
-
Q.S.Banana extract
-
0.4 ozCallebaut Cocoa Butter
-
2.1 ozCacao Barry Inaya 65%
Preparation: Salted Caramel
- Pour the cream and glucose into a saucepan.
- Split the vanilla bean lengthwise, scrape the seeds and add to the pan.
- Heat the mix to 60°-70°C (140°-158°F), then take off the heat and reserve.
- To make the dry caramel, start by heating an empty saucepan.
- Put the sorbitol in the hot pan and let it melt. Once it melts, add the sucrose gradually, letting it melt and caramelize after each addition.
- Once all the sucrose is melted and the caramel is light in color, turn off the heat.
- Add the butter and mix until it is melted and incorporated.
- Gradually add the warm cream and mix well after each addition.
- Return to the heat and heat until it reaches 107°C (225°F).
- Pour the hot caramel on the chocolate and cocoa butter and mix until incorporated.
- Add the Maldon sea salt and mix well by hand.
- Add a few drops of banana extract to your liking.
- Pour the caramel in a piping bag and and cool until cold enough to hold the piping bag in your hands, yet still warm enough to remain liquid.
- Reserve for assembly.
Tools
- Cooktop
- Knife
- Tall recipient
- Thermometer
- Piping Bag
- Bowl(s)
- Mixing bowl (s)
- Saucepans
- Cutting board
- Gloves (optional)
- Dropper
- Spatula(s)
Assembly and Finishing
Ingredients: Assembly and Finishing
-
Q.S.Walnuts, toasted and chopped
-
Q.S.caramelized walnuts
-
Q.S.Snow sugar
-
Q.S.F017602
-
Q.S.Cooking Spray
-
leaf/leavesEdible Gold Leaf
Preparation: Assembly and Finishing
- Spray the guitar strips with the cooking spray. Spread the grease evenly on the strips.
- Wrap a greased strip of guitar sheet around each cookie, greased side in, and secure with tape.
- Take the temperature of the caramel in the piping bag and make sure it is cool enough to handle.
- Place the cookies on a tray and on a scale.
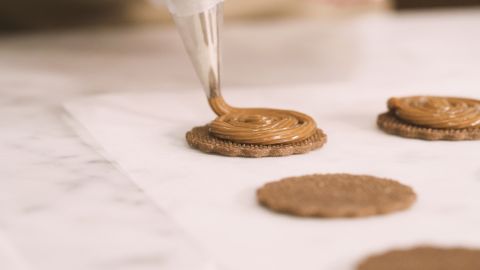
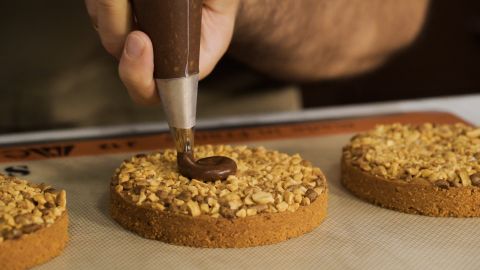
- Pipe 24g (0.9 oz) of caramel on each cookie.
- Cover the caramel with chopped walnuts. Allow to cool completely until the caramel is set.
- Carefully cut the tape holding the strip of guitar sheet and remove it from around each cookie.
- Using the cardboard as a guide, decorate the top of each cookie with some snow sugar.
- Finish decorating the cookies by shaving some walnut on top and gold flakes.
Tools
- Thermometer
- Scissors
- Gloves
- Paper towel
- Scale
- Spoon
- Microplane
- Tape
- Cutter
- Guitar sheet strips 4 cm x 22 cm (1.6” x 8.6”)
- 9.5 cm (3.7”) cardboard piece
- Sifter
Need support with your chocolate confections?
- Find troubleshooting guides & tutorials
- Chat live with an advisor chef and find the right solution to your challenges



Comments